This is the second article in a series. If you don’t have the base architecture built and you would like to follow along, please read this article first.
In this article, we’ll explore a practical use case for detecting and managing threats targeting a web application hosted on AWS. We’ll leverage the power of AWS Web Application Firewall (WAF) and AWS Shield to protect our application from common web exploits and distributed denial-of-service (DDoS) attacks. With our base architecture build, lets now switch to the AWS Console to configure AWS WAF and AWS Shield. To protect our web application from common web exploits and DDoS attacks, we’ll deploy AWS WAF (Web Application Firewall) and AWS Shield.
Deploying AWS WAF and AWS Shield
As we continue our article series on threat detection, we move to the AWS console. Start by navigating to the WAF and Shield page. You can see this in Figure 1.
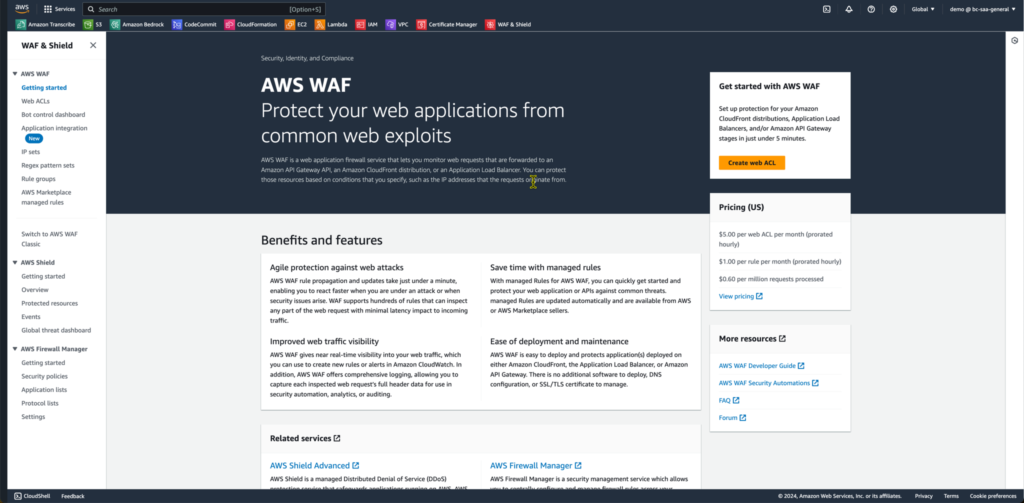
Figure 1.
Click on Create web ACL
Pick your resource type. In this case, its going to be regional because we are going to attach it to the ALB. You can see this in Figure 2.
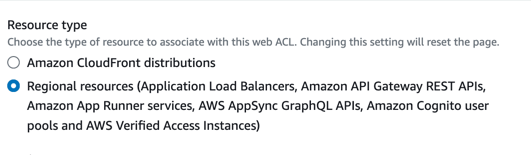

Figure 2.
You’ll need to give it a name and associate it with the ALB. It should look like Figure 3.
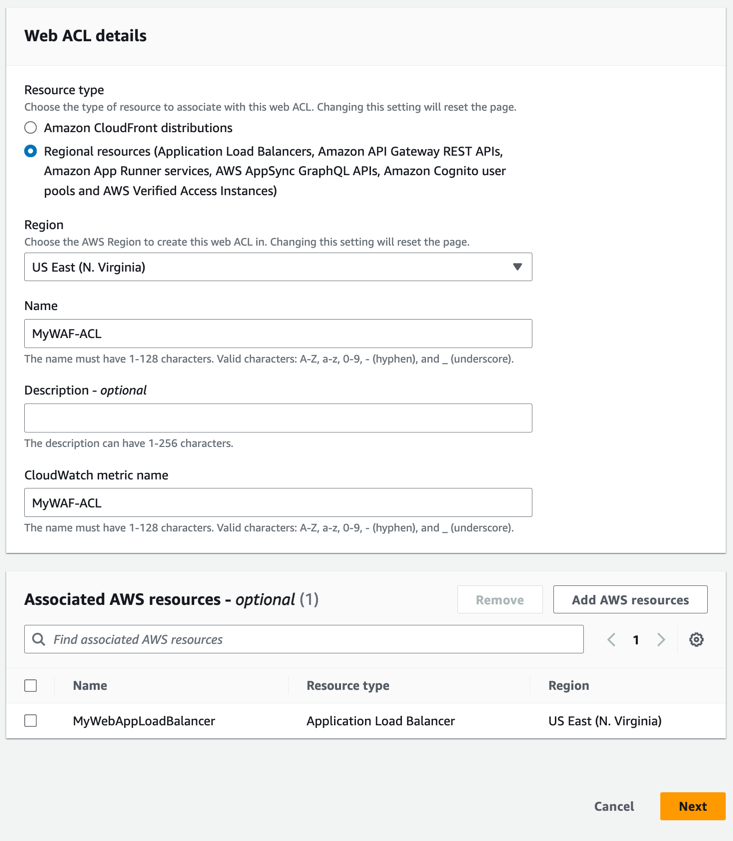

Figure 3.
Next we need to add a rule. We are going to add a managed rule group. These are rules that are prebuilt by AWS and other partners and they cover a lot of common exploits. Make sure you select “Add managed rule groups” as seen in figure 4.
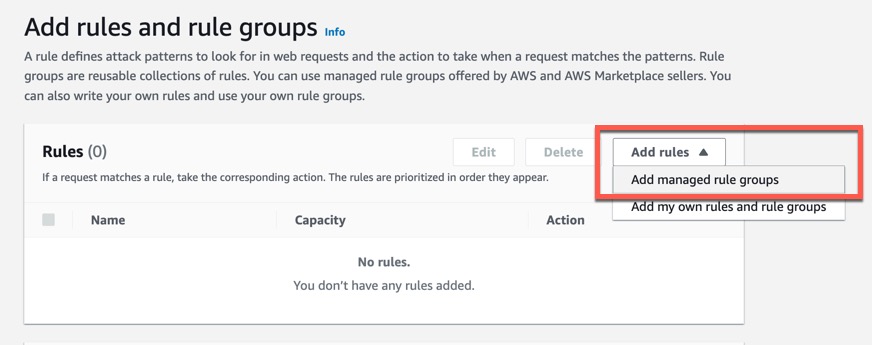

Figure 4.
AWS WAF charges subscription and usage fees for paid managed rule groups. These are in addition to the standard service charges for AWS WAF. AWS WAF Pricing
Expand the AWS managed rule groups and then select Core rule set, Known bad inputs, Linux operating system, and SQL database. Then at the bottom of the page click “Add rules.” These groups will add several rules to your WebACL that will protect your server against threats. You can then see the rules that have been added as shown in figure 5.
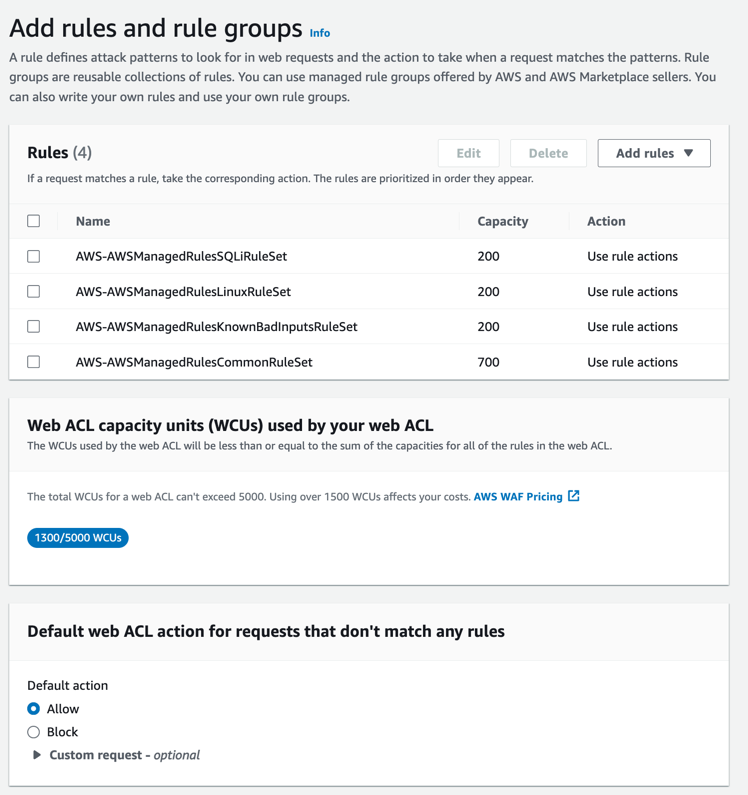

Figure 5.
You need to then click Next at the bottom of the page, then set the rule priority. You can leave the priority alone at this time. Then click Next. This is seen in Figure 6.


Figure 6.
The next step is important to the conversation about Threat Detection, and that’s the metrics we gather that give us visibility into how our web requests, web ACKs and rules are working. On the Configure metrics page you see that there are individual CloudWatch metrics for each set of enabled rules. You can see this in Figure 7.
At the bottom of the page you have the option to change request sampling. Leave this as is or you wont be able to see requests that match your WebACL rules.


Figure 7
The last page is your summary of everything you are creating. Scroll to the bottom and click Create web ACL.. It takes a bit for the WAF to be build, so be patient. When it’s done you’ll see the Web ACL listed as seen in figure 8.
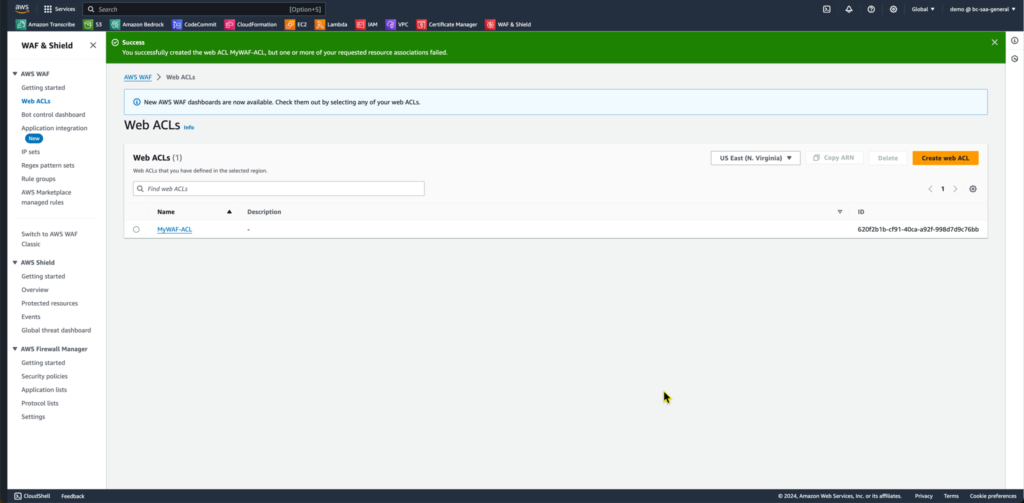

Figure 8.
With that you’ve enable WAF for your ALB to protect your EC2 instances. You are well on your way to providing Threat Detection and Management for your AWS environment. One las thing to do here would be to ensure that we are logging to CloudWatch. To do this, follow these steps:
- Go to the “Web ACLs” section and select the desired Web ACL.
- Click on the “Logging and Metrics” tab, and you’ll find various metrics like “AllowedRequests,” “BlockedRequests,” and “HTTPCode” metrics.
- Enable Logging to a CloudWatch Logs Log group. You may need to create a log group. When you do, it should begin with aws-waf-logs- or it will not show up as a log group to select.
We will come back to the logging bit later on.
Still there is more we can do, and we are going to continue that right here in the WAF & Shield. Next we are going to enable Shield Advanced. Navigate to this in the left hand menu as seen in figure 9.
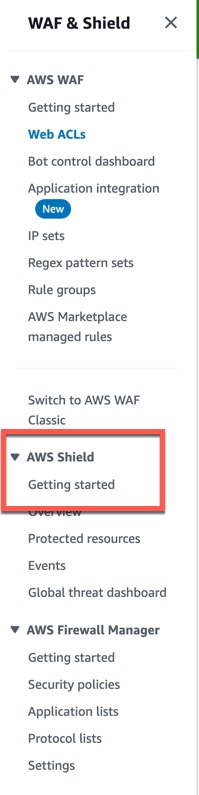

Figure 9.
There are a few things you should know about AWS Shield. First, AWS Shield is already enabled in your account. This protects against DDoS attacks. What’s not enabled is Shield Advanced. Shield Advanced is a paid subscription that costs $3000 USD per month. A comparison between the tiers is shown at the bottom of the Getting started page, and you can also see this in Figure 10.
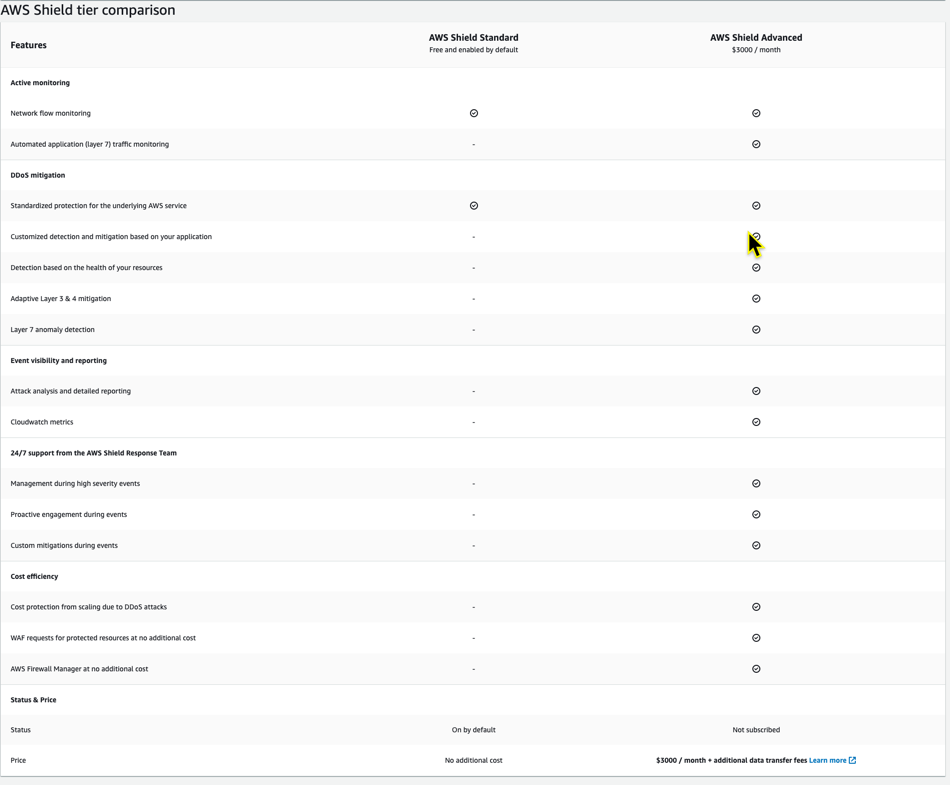

Figure 10.
One of the biggest benefits to Shield Advanced is the access to the AWS Shield Response Team. This team can help with manual mitigation of edge cases that affect your availability.
If you are willing to pay for the service then you simply click the subscribe button and then Acknowledge the service terms as shown in figure 11.
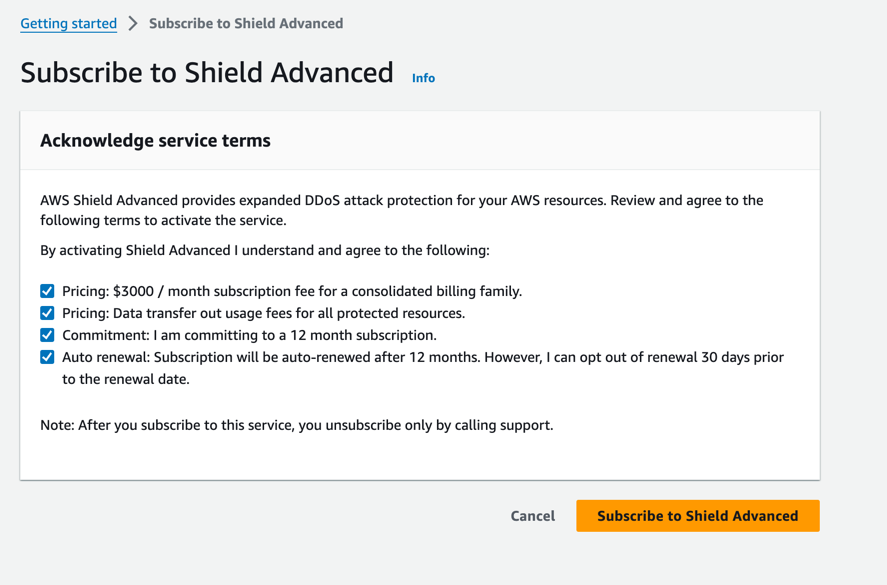

Figure 11
Once you are subscribed you will add resources to protect. You can skip this step, but we will do it for this example. Click Add resources to protect as see in figure 12.
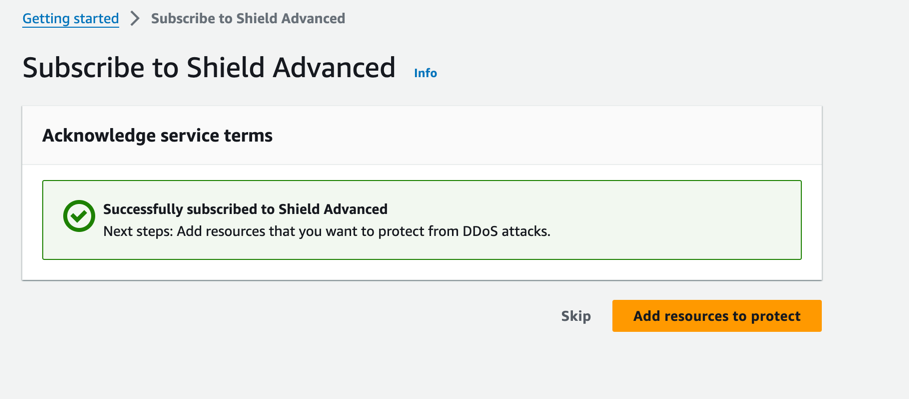

Figure 12.
On the next page you can load all the Resources and select which ones you want to protect. For now I am just going to select my load balancer. You can see what this looks like in Figure 13.


Figure 13.
At the bottom of that page you click the button Protect with Shield Advanced. Then on the Configure layer 7 DDoS mitigation in US East (N. Virginia) – optional page you select your balancer and click next. You can then configure health checks and alarms and notifications, but I’m going to leave those alone for now since they are optional, and I’ll finish the configuration.
Once this is done you should see the protection status as “OK” in the protections list as seen in figure 14.
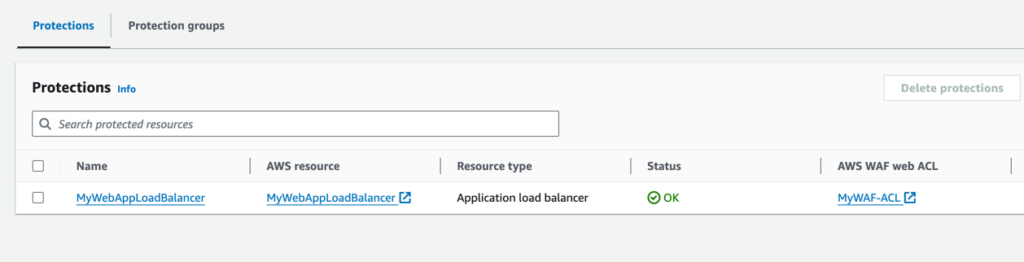

Figure 14.
With AWS WAF and AWS Shield now deployed, you’ve taken significant steps to detect and protect your web application against common exploits and DDoS attacks. You configured rules, logging, and protections to enhance your security posture. However, comprehensive threat detection requires a multi-layered approach. In the next article, we’ll explore how Amazon GuardDuty and Amazon Inspector can further improve your threat detection and vulnerability assessment capabilities, providing continuous monitoring and enabling you to proactively address potential security concerns across your AWS environment. Stay tuned as we continue building a threat detection and management solution on AWS.
